

You only need a few items to get started.

Supplies:
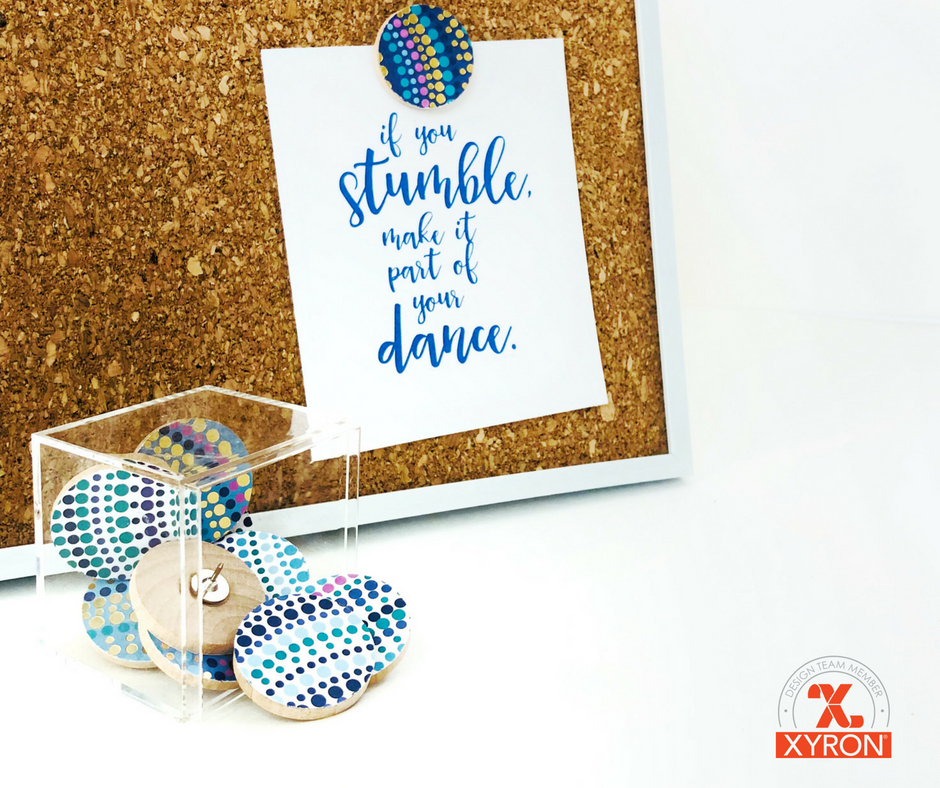
1 1/4 inch Small Wooden Circles
Flat Push Pins
Permanent Adhesive
1 1/4 inch Paper Punch
If you don't have a cork board already, you will also need the following:
8.5X11 inch frame
Cork Board Sheet
Cutting Blade
1. Adhere the flat push pins to the back of your small wooden circles and let dry for at least overnight.
2. Using your paper punch, punch out circles to add to the front of your push pins

3. Run your punched circles through the Xyron Creative Station.


5. Optional: Add a touch of waterbased sealer to the top of each push pin if needed.
6. To create a corkboard, just cut cork board sheets to the size of your frame with a ruler and cutting blade, remove the glass from the frame, insert the corkboard.

Thank you so much for stopping by. I hope you have a great time with this project. Don't forget to check out DCWV and Xyron's Instagram pages for more crafting inspiration.


No comments
Post a Comment